
QuickBooks Desktop Backup Online
Contents
2020 has been a crazy year for all. If we’ve learned anything, it’s to be flexible and adaptable to the changing environment while being prepared for the worst. This lesson can be applied to your office. More than ever, it’s important to backup your QuickBooks files for data protection, disaster recovery, and to ensure your files are performing at their best and error free. In this article, we’ll provide easy steps to complete a quick QuickBooks Desktop backup online as well answering some common questions such as:
- What is the best way to backup QuickBooks?
- How do I backup QuickBooks Desktop Online?
- How do I complete a QuickBooks Online Backup Restore?
What is the best way to backup QuickBooks?
What is the best way to backup QuickBooks and how often is completely up to you and your preference. We prefer to manually create QuickBooks backups ourselves anytime a significant amount of work has been done to the file such as payroll or monthly reconciliations. To complete a manual backup, Intuit provides the following instructions:
- In QuickBooks, go to the File menu and select Switch to Single-user Mode.
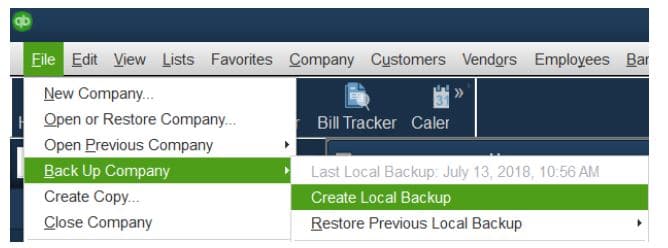
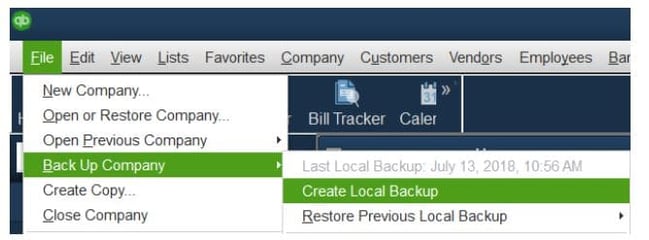
- Go to the File menu again and hover over Back up Company. Then select Create Local Backup.
- In the window, select Local Backup and then Next.
- In the Local Backup Only section, select Browse and select where you want to save your backup company file.
- Set the number of backups you want to keep. This is optional.
- This runs a test to make sure your backup file is in good shape before you save.
- When you’re ready, select OK.
- Select Save it now and Next.
How do I backup QuickBooks Desktop Online?
It’s important to save your backups in a location not on your PC just in case something was to happen to your hard drive. That is why we recommend you save your QuickBooks Desktop backup online or even on a flash drive. There are many free options to store your QuickBooks Desktop backup online such as DropBox, Google Drive and Box.
If you wanted to create a QuickBooks Desktop backup online, you would follow the instructions above. Once you get to Step 4, you would Browse to your online application then follow the remaining steps to complete the QuickBooks Desktop backup online.
QuickBooks Online Backup Restore
Once you complete the backup, you’ll have a .QBB file. At any time, you can use this to convert your QuicBooks Desktop backup online to a live QBW working file.
If your backup company file is on an external device like a flash drive or a third-party syncing application like DropBox or Google Drive, you’ll need to first move your .QBB file to your PC. Then Intuit provides the following instructions to restore your file:
- In QuickBooks, go to the File menu and select Open or Restore Company.
- Select Restore a backup copy and then Next.
- Select Local Backup and then Next.
- Browse your computer for your backup company file. It should look like this: [Your company name].qbb.
- Select a folder to decide where to save your restored company file. Then select Open.
- When you’re ready, select Save. If you see any messages about possibly overwriting your data, select the option that best fits your needs. Don’t overwrite anything unless you know you want to.
Once complete, you now have a new company file you can work from.
QuickBooks Desktop Backup Online with Qbox!
Hopefully this article has helped you learn how to create a backup file of QuickBooks online yourself. Take some stress away by using Qbox, an easy way to share your QuickBooks Desktop files with remote users. Every time a user locks and syncs a file, Qbox creates a backup file in the cloud. Qbox retains the last 20 versions of the file for you so at any time, you can rollback to a previous version with a few clicks. To learn more, visit https://www.qboxplus.com/how-qbox-works/
Share on facebook
Facebook
Share on twitter
Twitter
Share on linkedin
LinkedIn